

Mobile Home Windows for Sale
Here’s what you need to know about replacing mobile home windows:
Why Replace Mobile Home Windows?
If you live in a mobile home that still has the original windows you will want to replace your windows as soon as possible. While it is a large upfront investment the long-term savings on your energy costs and the updated appearance will make it worth every dime.
Replacing windows is a smart mobile home remodeling project that will affect both the interior and exterior of your home and give you better control over your temperature and energy consumption. It’s a win, win, win.


(Odd) Size Matters
In most older mobile and manufactured homes, you cannot buy a standard window at Lowe’s and expect it to fit the opening in a mobile home unless you plan on retrofitting it.
Unless retrofitting sounds like your idea of a good time, you will want to order the exact size you need from a mobile home supply store. Keep in mind that if you order the windows online the shipping increases the price per window significantly so try to find a local mobile home supplier first.
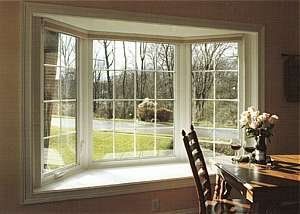
Window Designs Used in Mobile Homes
Mobile homes typically have four basic types of windows: jalousie windows, horizontal sliders, vertical sliders, and awning windows.
Jalousie Windows
Jalousie windows were used a lot before 1976. It’s several pieces of rectangular glass that open when you turn the dial. They open fully to allow great air circulation but they don’t seal well at all. You will see significant savings if you replace jalousie windows.
Awning Window
From 1976 to the mid-1980’s the awning window was popular in manufactured homes. It’s the same design as a jalousie window but there are only two panes of glass that open instead of 10 (depending on the size of the window).
Vertical and Horizontal Sliding Window
Vertical sliding windows are found in manufactured homes built in the late 1980’s and 1990’s. There are 2 panes of glass that are on tracks and slide to open and close.
Parts of a Window
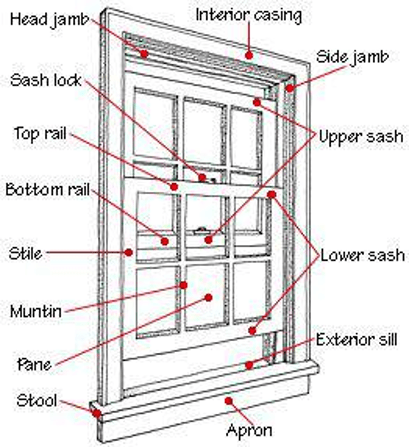
Single or Double-Hung?
A single-hung window
is fairly self-explaining: In a single-hung window the bottom panel, or sash, moves vertically, while the upper sash remains stationary (source).
When opened, the bottom sash obstructs, at least partially, the upper sash. While they are cheaper than double-hung, you get the same appearance. You are losing r-value and insulating properties compared to double-hung window.
A double-hung window
offers the homeowner the ability to open each sash, rather than just the bottom sash. This allows for better air flow and ventilation.
The ability to open and tilt each sash makes cleaning easier, too.
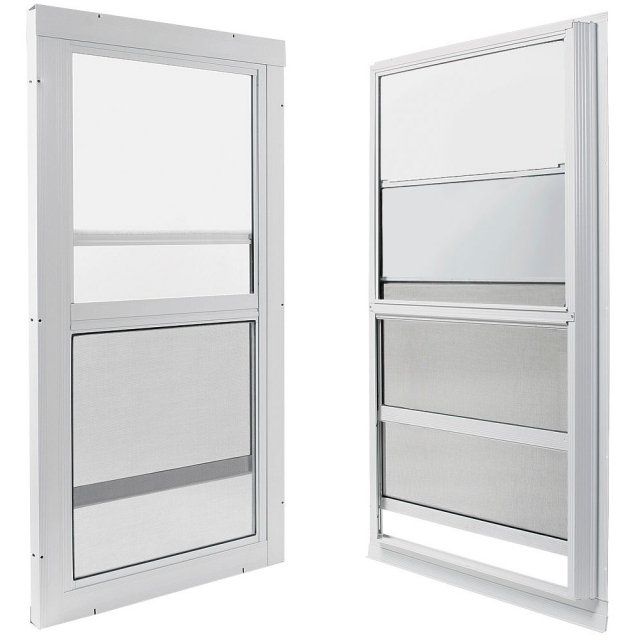
Vinyl or Aluminum?
The two most common window frame materials for mobile and manufactured homes are vinyl and aluminum. Each has their advantages and disadvantages.
Vinyl Windows
Vinyl
is the most popular window frame material because it is a relatively cheap and has a great lifespan. Vinyl is available in several colors but white is the top pick. Vinyl is a top performer for stopping heat loss.
Aluminum Windows
Aluminum windows have been used on mobile and manufactured homes for decades. It is strong and cheap to produce and does very well at creating an airtight seal. Most will agree that aluminum windows aren’t the prettiest but they get the job done and that’s all that matters.
Aluminum windows are cheaper than vinyl. What you lose in appearance you gain in value.
Signs its time to replace your windows:
• Your windows let in a strong draft on windy days.
• Drafts let in allergens, so an increase in allergy-related symptoms may be a reason to check your windows.
• Drafts also mean that insects, small pests, etc. may be making their way into your home. Check the condition of your windows if you notice a lot more little critters.
• Drafty windows mean more energy is needed to cool or warm your house. Rising utility bills may mean it’s time to replace those windows!
• During rain or snowstorms, your windows are constantly letting water seep through.
• Leaky windows can lead to mold build-up around the window frame. If you are noticing mold, then before it begins to damage your walls, consider getting your windows inspected.
• If the windows are hard to open or stuck.
• Side note: this sign by itself could indicate that your mobile home is not level, or that your window needs to be lubricated.
Do your windows match any of these descriptions? If you’ve realized that it’s time to replace your windows, then follow the steps below.
Please note: the following supply list and steps are for owners of mobile homes that have horizontal or vertical sliding windows, not older mobile home models with windows that open outward. Also, these steps will not perfectly apply to double-hung windows if you are wanting to replace those.
Supply List
• Carpenter Square
• Hand Held Drill
• Measuring Tape
• Screwdriver
• Screws
• Sealant
• Steel Brush
• Putty
Other supplies may be needed if you are looking to do any custom upgrades, like soundproofing for example.
Step 1: Measure the Window
Before purchasing a new window to replace the older one, measure the current window. Measure all four side as well as diagonally. The size will have to be an exact match for that perfect window fix you’re hoping to achieve!
If the replacement window is too big, it’ll be a no-go for squeezing in. Also, if it’s too small, the window will fall right through!
Step 2: How is the current window mounted?
This step, along with measurements, is key to an easy window replacement. Mobile home windows tend to have two different ways in which they are mounted:
• Flush-Mounted: The frame is screwed on over the siding.
• Lap-Siding Mounted: The frame’s screws are covered by the siding.
• If this is how your frame is mounted, then you will have an added step of removing the siding that covers the window.
Installation will be much easier if the way your new window mounts is the same as the old one.
Step 3: Remove the Window
Remove the screws from the window frame.
• Make sure to either keep a screw, or write down the diameter of the screws you take out, so that way the new screws fit nicely into the already existing hole. Besides paying attention to diameter, make sure your screws are longer than your previous ones.
• After all the screws have been removed from the frame, carefully remove the mobile home window.
Step 4: Clean Up Time
Use a steel brush to make sure you remove all the old sealant and putty. If you don’t, you might find it difficult to fit the new window into the frame. You may also be unable to create an effective seal around the window if the old is still in the way.
Step 5: Apply New Putty
Once you have removed the old putty, it is time to prep the putty for application. Put a line of putty tape around the entire window frame.
For added protection against moisture, apply two layers of putty at the top of the opening. This is a simple step with major, practical benefits.
Step 6: Inserting the Window
Put the new window in the window frame. Drill one screw into the middle of the window frame on each side of the window. Do not tighten the first screws you put in until the rest are in place
Make sure that you drill the screws in straight.
Step 7: Mobile Home Windows Squared?
No, no, no. We are not talking about algebra homework! We are talking about the shape of your window once placed in the window frame.
If a window is not square, you will have a difficult time opening and closing. But, if you want a window to only look through and not open, then don’t worry about it.
Grab a trusty, but hopefully not rusty, carpenter’s square. Use the square to make sure that all the corners of your window have that oh-so-desired 90-degree angle. Check one more time if the window can open and close without any bending.
If the window is square, drill the corner screws into the frame.
Step 8: Screwed Up Tight
Squared window? Check.
All screws are in place? Check.
Now will be the time when you tighten all of the screws completely
The reason for waiting until now to tighten the screws is that if you had tightened the screws earlier, and the window was not square and did not open and shut properly, then you would have had to spend more time and effort to fix the new window.
Waiting to tighten all your screws also ensures that the window doesn’t shift during installation.
Step 9: Seal the Window
It is time to do some sealing!
The sealant is the icing on the cake, the last step, or the grand finale! The sealant will work at protecting your wall, frame, and window from moisture seeping in, as well as keeping your heating and cooling inside of the mobile home.
There are two choices that stand out as sealant options for exterior windows:
• Siliconized Latex
• Silicone
The benefits for the siliconized latex is that the latex component makes it an easier sealant to use. However, silicone sealants are not only waterproof, but they are mold-resistant! And they won’t damage your siding.
Whichever you choose, either of these sealants will work properly for your newly installed windows!
Conclusion
Old windows that are not in good condition are not only hard to open and annoying on windy days, they can also cause serious damage down the line. Mold, higher bills, and water damage are only a few of the problems.
New windows are easy to install and not too expensive to buy. Instead of ignoring your old problem-causing windows, take our guide and get to work!
